About Astrophotography
Astrophotography is probably one of the most technically challenging form of photography. In addition to the fact the targets are extremely dim and needs hours of exposure, earth slowly turns and makes stars trail in the image. To get a sharp image from the sky this motion has to be compensated precisely using a tracking mount. This puts great demand on the accuracy of the machining of the mount gears. Proper mount is the ground of where astroimaging is build. Even the brightest deep sky objects need hours of exposure to reveal the dimmest parts of the target. These exposures are usually taken in shorter parts, but it is common to expose 10 minutes at a time. During the ten minutes camera collects also lots of unwanted signal like thermal noise and light pollution from city lights. These are minimised using cooling and filtration or moving to a darker site.
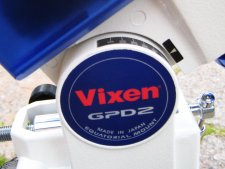
Currently my imaging setup builds on a Vixen GP-D2 mount. I have an excellent PowerFlex MTS-3 controller from Boxdoerfer Electronics controlling the stepper motors. Powerflex controller has a serial port connector for computer control. As Vixen, like any other reasonable priced mount, doesn't track well enough for astrophotography alone. Mount has to be guided using a computer software computer. Computer reads a star position from Imaging Source DMK21AU04.AS USB camera attached to a small 50mm f4.1 guidescope from Teleskop-Service. This information is used to calculate and command small corrective actions to the mount. I use PHDGuiding to handle the autoguiding process. Before I got the Vixen mount I imaged with an Orion Skyview Pro mount. I got some quite nice results with it, but it was extremely difficult to get it to track well, even when quided. The mount also has to be aligned precicely towards the celestial pole. I use Kochab Clock method which gives accurate alignment for my needs.
The imaging camera I use is Atik Instruments' 4000LE cooled CCD camera. It has a monochrome sensor which is very sensitive and cooled several tens of degrees below ambient. The camera is specifically designed for astronomical imaging and is very good in narrowband imaging. Atik 4000LE is completely depended on computer compared to self sufficent DSLR. I did most of my imaging before 2009 with Canon EOS 350D digital SLR, which had been modified for greater sensitivity. Stock Canons have internal IR cut off filter which dims astronomically important wavelenghts, such as H-alpha at 656.3nm. My camera had this filter removed which allowed me to use filters designed for astrophotography. I have sold this camera and jumped into CCD world. I still have a stock Canon 1000D for scenery shots and of course for normal daytime use.
Some objects like Nebulae emits their light in very specific wavelenghts. This gives a good opportunity to do some serious imaging under suburban light polluted skies. Narrowband filters are tuned to these specific wavelengths and blocks any other wavelengts from entering to the sensor, including light pollution. I use Baader 2" H-alpha, OIII and SII filters, which give deep contrast in emission nebulae. These three filters are used to create color narrowband images. I use Starlight Xpress USB Filter wheel to change filters without removing camera and thus affecting focus or camera orientation.
My current imaging scope is Skywatcher ED80 Pro. It is a 80mm f7.5 refractor, with apochromatic objective. The lens is a doublet ED lens and it has significant field curvature with large format cameras such as DSLRs and Atik 4000LE. William Optics 0.8x reducer flattener works fine with this scope. Putting the reducer directly to the CCD camera or Canon T-adapter won't give the best results, since the optimal distance to the sensor is 56.5mm from the thread base. Canon DSLR's has a body thickness of 44mm which wassn't quite there with a T-adapter. I used 7.5mm extension to get the best result. Atik has shorther distance of 18mm from threads to the CCD. This gives me an opportunity to place a filter wheel between the reducer and camera and still there is little space left for future accessories.
Focusing is one of the most important phase in taking an astrophoto. I use software assisted focusing using Nebulosity The software reads star image from the camera and displays FWHM value in screen which has to be minimised. Critical focusing is very precice job and focuser plays very important role in it. Camera has to be positioned in greater than 0.1mm accuracy to make a sharp image. With f6 focal ratio, critical focus zone is only 0.079mm. I've replaced the original focuser with TS Crayford focuser. This focuser has 1:10 reduction and a locking screw. One revolution with the reduced knob moves the focuser only 1.4mm. This knob is driven by computer controlled focus motor from Shoestring Astronomy and gives me the possibility to do hands free focusing - even remotely from the warmth of my house.
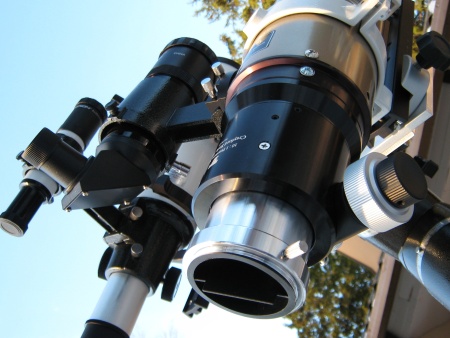
Image aqcuisition is controlled by Nebulosity2. The software handles also cooling in the camera and allows me to do sequencing of the images, filter changes, dithering etc.. Dithering is a method of slightly moving the image field between exposured to avoid static errors between images summarizing into the end result. Image is transferred to computer between exposures, that way I can do quality control during the exposure sequence and check if everything is working as expected. A very crucial part of post processing is taking good quality calibration images. Flat Field is definitely the most powerful of them in addition to Dark and Bias frames. Flat Field is used to eliminate effects of uneven illumination in the image caused by dust motes, vignetting and response differences between the camera pixels. Before disassebling everything I shoot flats using self made flat target. My flat target uses electroluminence foil to generate evenly illuminated flat area. Also one key factor in long exposure photography is dew control. I use Kendrick V7 controller with Dew-Not heater stripes. Everything, including the camera, computer, dew control and mount is powered from a 45Ah AGM battery.
Rest of the work is done in post processing. During days and cloudy nights I shoot sets of dark and bias frames for calibration and post process the actual images. Post processing requires calibration, registration, stacking, color combining ets. My post processing toolbox includes CCDStack, Adobe Photoshop CS3 and GradientXTerminator. Also a very important thing is color calibrated monitor, which is possible using Spyder 3 Pro color calibration device. After hours in cold capturing the data and usually at least equal amount of processing time, it is rewarding to see the final image in the computer screen!